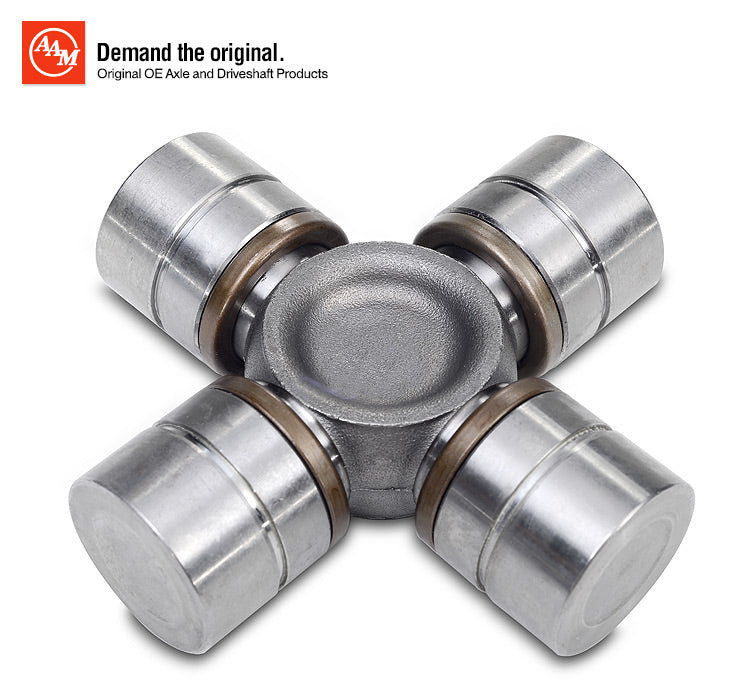
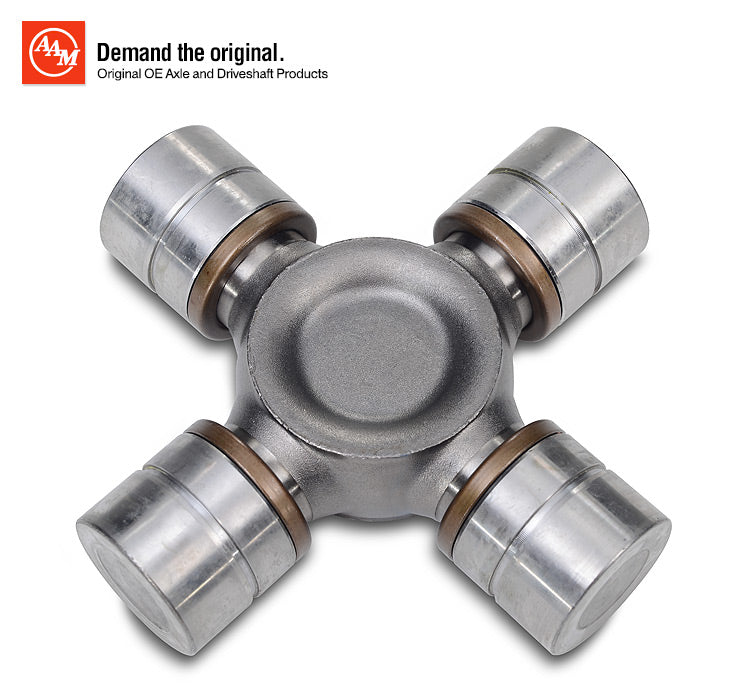
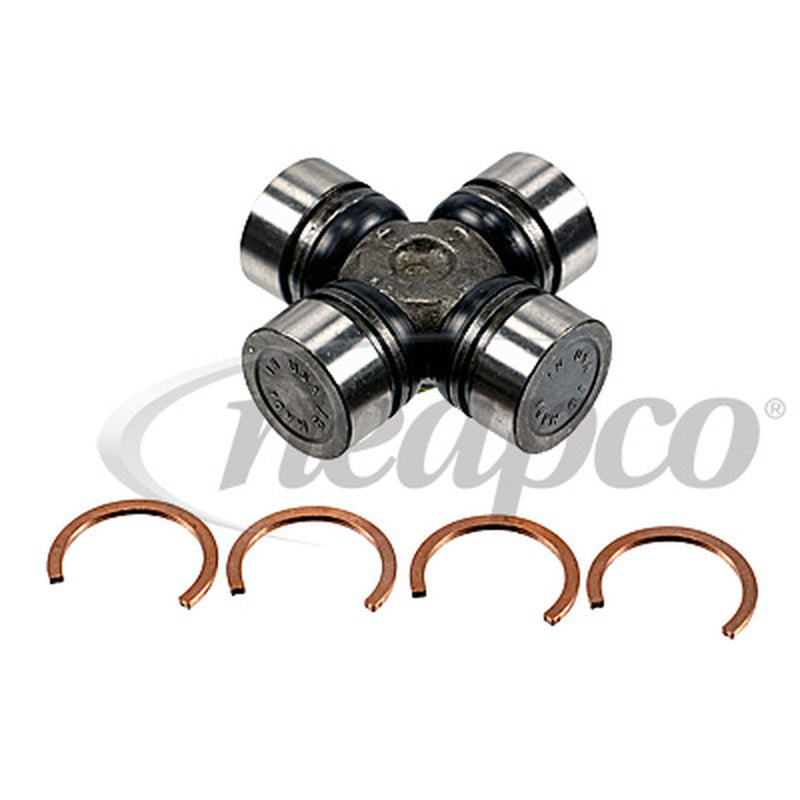
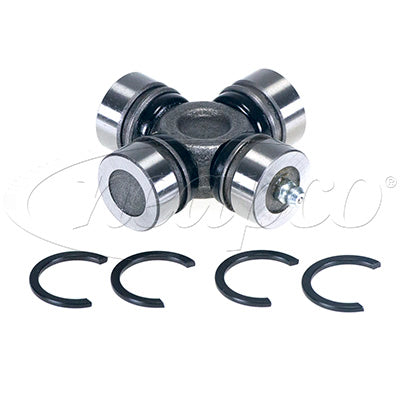
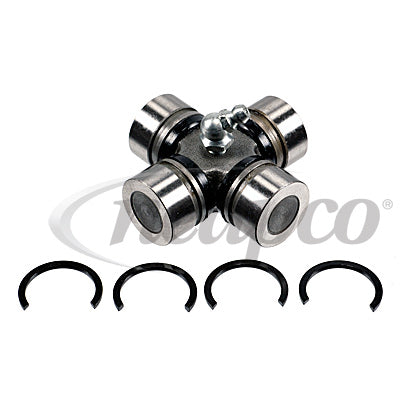
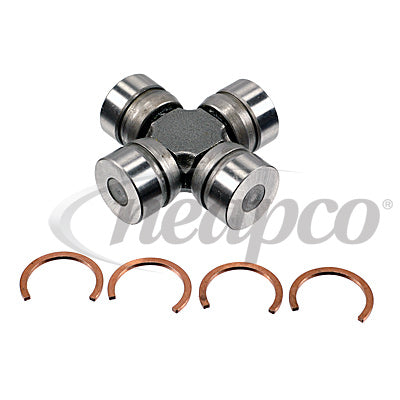
{"id":3749233950772,"title":"Rockford 430-9A U-Joint \"Staked In\"","handle":"430-9a","description":"\u003ch2\u003eRockford Drive Shaft Universal Joint 430-9A\u003cbr\u003e- Speciality “STAKED-IN” Replacement U-Joint\u003c\/h2\u003e\n\u003cinput id=\"tab1\" type=\"radio\" name=\"tabs\" checked\u003e \u003clabel for=\"tab1\"\u003eNotes\u003c\/label\u003e \u003cinput id=\"tab2\" type=\"radio\" name=\"tabs\"\u003e \u003clabel for=\"tab2\"\u003eSpecs\u003c\/label\u003e \u003cinput id=\"tab3\" type=\"radio\" name=\"tabs\"\u003e \u003clabel for=\"tab3\"\u003eVehicle Fit\u003c\/label\u003e \u003cinput id=\"tab4\" type=\"radio\" name=\"tabs\"\u003e \u003clabel for=\"tab4\"\u003eInstall\u003c\/label\u003e\n\u003csection id=\"content1\"\u003e\n\u003cp\u003e\u003cspan\u003eThis u-joint replaces the OEM ‘staked in’ u-joint found on select vehicles. See vehicle fitment section for the list of applicable vehicles. The u-joint converts from the OEM staked u-joint to an inside C-clip u-joint using the flats on the inside of the yoke ears. The yoke ears must have milled flats for this u-joint to fit. \u003c\/span\u003e\u003cspan\u003eDouble check the application before you press or cut out your original equipment u-joints. \u003c\/span\u003e\u003c\/p\u003e\n\u003cp\u003e \u003c\/p\u003e\n\u003c\/section\u003e\n\u003csection id=\"content2\"\u003e\n\u003cp\u003e\u003cstrong\u003eSpecifications\u003c\/strong\u003e\u003c\/p\u003e\n\u003cmeta charset=\"utf-8\"\u003e\n\u003ctable class=\"table\" data-mce-fragment=\"1\"\u003e\n\u003ctbody data-mce-fragment=\"1\"\u003e\n\u003ctr data-ng-repeat=\"(key,val) in part.partData.attrs\" class=\"ng-scope\" data-mce-fragment=\"1\"\u003e\n\u003ctd class=\"ng-binding\" data-mce-fragment=\"1\"\u003e\u003cstrong\u003eOEM Series:\u003c\/strong\u003e\u003c\/td\u003e\n\u003ctd class=\"ng-binding\" data-mce-fragment=\"1\"\u003eStaked-In Replacement\u003c\/td\u003e\n\u003c\/tr\u003e\n\u003ctr data-ng-repeat=\"(key,val) in part.partData.attrs\" class=\"ng-scope\" data-mce-fragment=\"1\"\u003e\n\u003ctd class=\"ng-binding\" data-mce-fragment=\"1\"\u003e\u003cstrong\u003eManufacturer:\u003c\/strong\u003e\u003c\/td\u003e\n\u003ctd class=\"ng-binding\" data-mce-fragment=\"1\"\u003eRockford\u003c\/td\u003e\n\u003c\/tr\u003e\n\u003ctr data-ng-repeat=\"(key,val) in part.partData.attrs\" class=\"ng-scope\" data-mce-fragment=\"1\"\u003e\n\u003ctd class=\"ng-binding\" data-mce-fragment=\"1\"\u003e\u003cstrong\u003eGreasable:\u003c\/strong\u003e\u003c\/td\u003e\n\u003ctd class=\"ng-binding\" data-mce-fragment=\"1\"\u003eGreasable\u003c\/td\u003e\n\u003c\/tr\u003e\n\u003ctr data-ng-repeat=\"(key,val) in part.partData.attrs\" class=\"ng-scope\" data-mce-fragment=\"1\"\u003e\n\u003ctd class=\"ng-binding\" data-mce-fragment=\"1\"\u003e\u003cstrong\u003eSnap Ring Type:\u003c\/strong\u003e\u003c\/td\u003e\n\u003ctd class=\"ng-binding\" data-mce-fragment=\"1\"\u003eInside Snap Ring\u003c\/td\u003e\n\u003c\/tr\u003e\n\u003ctr data-ng-repeat=\"(key,val) in part.partData.attrs\" class=\"ng-scope\" data-mce-fragment=\"1\"\u003e\n\u003ctd class=\"ng-binding\" data-mce-fragment=\"1\"\u003e\u003cstrong\u003eManufacturer Part Number:\u003c\/strong\u003e\u003c\/td\u003e\n\u003ctd class=\"ng-binding\" data-mce-fragment=\"1\"\u003e430-9A\u003c\/td\u003e\n\u003c\/tr\u003e\n\u003ctr data-ng-repeat=\"(key,val) in part.partData.attrs\" class=\"ng-scope\" data-mce-fragment=\"1\"\u003e\n\u003ctd class=\"ng-binding\" data-mce-fragment=\"1\"\u003e\u003cstrong\u003eBearing Cap Diameter:\u003c\/strong\u003e\u003c\/td\u003e\n\u003ctd class=\"ng-binding\" data-mce-fragment=\"1\"\u003e0.791 Inch\u003c\/td\u003e\n\u003c\/tr\u003e\n\u003ctr data-ng-repeat=\"(key,val) in part.partData.attrs\" class=\"ng-scope\" data-mce-fragment=\"1\"\u003e\n\u003ctd class=\"ng-binding\" data-mce-fragment=\"1\"\u003e\u003cstrong\u003eLock Up:\u003c\/strong\u003e\u003c\/td\u003e\n\u003ctd class=\"ng-binding\" data-mce-fragment=\"1\"\u003e1.315 Inch\u003c\/td\u003e\n\u003c\/tr\u003e\n\u003c\/tbody\u003e\n\u003c\/table\u003e\n\u003cp\u003e\u003cem\u003eVMRS: 024002046\u003c\/em\u003e\u003c\/p\u003e\n\u003c\/section\u003e\n\u003csection id=\"content3\"\u003e\n\u003cp\u003e\u003cstrong\u003eVehicle Fitment\u003c\/strong\u003e\u003c\/p\u003e\n\u003ctable width=\"100%\"\u003e\n\u003ctbody\u003e\n\u003ctr\u003e\n\u003ctd style=\"width: 34.2612%;\"\u003e\u003cstrong\u003eMake \u0026amp; Model \u003c\/strong\u003e\u003c\/td\u003e\n\u003ctd style=\"width: 43.7388%;\"\u003e\u003cstrong\u003eYear\u003c\/strong\u003e\u003c\/td\u003e\n\u003c\/tr\u003e\n\u003ctr\u003e\n\u003ctd style=\"width: 34.2612%;\"\u003eHonda, \u003cem\u003eCRV\u003c\/em\u003e\n\u003c\/td\u003e\n\u003ctd style=\"width: 43.7388%;\"\u003e2002, 2003, 2004, 2005, 2006\u003c\/td\u003e\n\u003c\/tr\u003e\n\u003c\/tbody\u003e\n\u003c\/table\u003e\n\u003c\/section\u003e\n\u003csection id=\"content4\"\u003e\n\u003ch3\u003e\u003cstrong\u003eDisassembly of the “Non-Rebuildable” U-Joint\u003c\/strong\u003e\u003c\/h3\u003e\n\u003cp\u003e\u003cstrong\u003e\u003cimg src=\"\/\/cdn.shopify.com\/s\/files\/1\/2012\/8549\/files\/DISASSEMBLY_large.png?v=1562953594\" alt=\"Disassembly\"\u003e\u003c\/strong\u003e\u003c\/p\u003e\n\u003cp\u003e\u003cstrong\u003e1.\u003c\/strong\u003e Use a press or a hammer to force the bearing cap out of the staked ear hole.* \u003cem\u003eNOTE: CONSIDERABLE FORCE MAY BE REQUIRED.\u003c\/em\u003e\u003cbr\u003e\u003cstrong\u003e2.\u003c\/strong\u003e Use a vise or pliers to remove the bearing cap which is exposed on the opposing side, a twisting motion may help unseat the cap.\u003cbr\u003e\u003cstrong\u003e3.\u003c\/strong\u003e A small grinding wheel or cartridge roll \u0026amp; arbor may then be used to smooth the staked earhole on the driven side “A” in order to make the removal of the opposite bearing cap easier.\u003cbr\u003e\u003cstrong\u003e4.\u003c\/strong\u003e Use the same method as above to remove the remaining bearing caps.\u003cbr\u003e\u003cstrong\u003e5.\u003c\/strong\u003e Once the bearing caps are removed discard the used joint and inspect the yoke and flange for damage and clean out the remaining staked tabs\u003c\/p\u003e\n\u003ch3\u003eReassembly of the “Non-Rebuildable” U-Joint\u003c\/h3\u003e\n\u003cp\u003e\u003cimg src=\"\/\/cdn.shopify.com\/s\/files\/1\/2012\/8549\/files\/reassembly_large.png?v=1562954694\" alt=\"Reassembly\"\u003e\u003c\/p\u003e\n\u003cp\u003e\u003cstrong\u003e1.\u003c\/strong\u003e Press the new U-joint and bearing caps into position and insert clip (Fig. 4). \u003cbr\u003e\u003cstrong\u003e2.\u003c\/strong\u003e Use a press or hammer to expose the opposite slot then insert the second clip (Fig. 5). \u003cbr\u003e\u003cstrong\u003e3.\u003c\/strong\u003e Use the same method to insert the remaining clips.\u003cbr\u003e\u003cstrong\u003e4.\u003c\/strong\u003e Make certain that the clips are completely seated into the groove of the new bearing caps. \u003c\/p\u003e\n\u003cp\u003e\u003cstrong\u003eInstallation tips\u003c\/strong\u003e\u003c\/p\u003e\n\u003cp\u003e- When the snap rings are installed they may leave a large gap at the top of the yoke.\u003cbr\u003e-To assure a good contact fit you need to roll the snap ring around in the groove of the cup to get the most possible surface of the snap ring against the inside of the yoke ears\u003c\/p\u003e\n\u003cp\u003e\u003cimg src=\"\/\/cdn.shopify.com\/s\/files\/1\/2012\/8549\/files\/Snap_Ring_large.png?v=1562955278\" alt=\"Snap Ring Install\"\u003e\u003c\/p\u003e\n\u003cp\u003e1. Install Snap Ring into Bearing Cup Groove\u003cbr\u003e2. Rotate Snap Ring 180 degrees\u003cbr\u003e3. Placement required to get most contact with yoke\u003c\/p\u003e\n\u003c\/section\u003e\n\u003cstyle\u003e\u003c!--\np:not(:last-child) {\n margin: 0 0 20px;\n}\n\n\nsection {\n display: none;\n padding: 50px 0 0;\n border-top: 1px solid #DE330E;\n}\n\n#tab1 {\n display: none;\n}\n#tab2 {\n display: none;\n}\n#tab3 {\n display: none;\n}\n#tab4 {\n display: none;\n}\n\nlabel {\n display: inline-block;\n margin: 0 0 -1px;\n padding: 15px 25px;\n font-weight: 600;\n text-align: center;\n color: #abc;\n border: 1px solid transparent;\n}\n\nlabel:before {\n \n font-weight: normal;\n margin-right: 10px;\n}\n\nlabel[for*='1']:before { content: '\\f1cb'; }\nlabel[for*='2']:before { content: '\\f17d'; }\nlabel[for*='3']:before { content: '\\f16c'; }\nlabel[for*='4']:before { content: '\\f171'; }\n\nlabel:hover {\n color: #789;\n cursor: pointer;\n}\n\ninput:checked + label {\n color: #DE330E;\n border: 1px solid #abc;\n border-top: 2px solid #DE330E;\n border-bottom: 1px solid #fff;\n}\n\n#tab1:checked ~ #content1,\n#tab2:checked ~ #content2,\n#tab3:checked ~ #content3,\n#tab4:checked ~ #content4 {\n display: block;\n}\n--\u003e\u003c\/style\u003e","published_at":"2019-07-10T15:05:47-04:00","created_at":"2019-07-10T15:05:47-04:00","vendor":"Rockford","type":"Universal Joint Kit","tags":["4309A","Brand_Rockford","Cap Size_0.791\"","CapSizeBullet_0.791\"","Grease_Greasable","LockUpBullet_1.315\"","Part_U-Joint","Series_Staked-In Replacement","SeriesBullet_Staked-In Replacement","Snap Ring to Snap Ring_1.315\"","U-Joint Type_Inside Snap Ring","U-Joint Type_Staked-In","UJointTypeBullet_Inside Snap Ring","Vehicle_Honda"],"price":3758,"price_min":3758,"price_max":3758,"available":true,"price_varies":false,"compare_at_price":null,"compare_at_price_min":0,"compare_at_price_max":0,"compare_at_price_varies":false,"variants":[{"id":28961460650036,"title":"Default Title","option1":"Default Title","option2":null,"option3":null,"sku":"430-9A","requires_shipping":true,"taxable":true,"featured_image":null,"available":true,"name":"Rockford 430-9A U-Joint \"Staked In\"","public_title":null,"options":["Default Title"],"price":3758,"weight":748,"compare_at_price":null,"inventory_quantity":-68,"inventory_management":null,"inventory_policy":"deny","barcode":"","requires_selling_plan":false,"selling_plan_allocations":[]}],"images":["\/\/www.actionmachineinc.com\/cdn\/shop\/products\/430-9A.UJoint.34.jpg?v=1562785608","\/\/www.actionmachineinc.com\/cdn\/shop\/products\/430-9A.UJoint.jpg?v=1562785612","\/\/www.actionmachineinc.com\/cdn\/shop\/products\/430-9A.Box.jpg?v=1562785619"],"featured_image":"\/\/www.actionmachineinc.com\/cdn\/shop\/products\/430-9A.UJoint.34.jpg?v=1562785608","options":["Title"],"media":[{"alt":null,"id":3021941506183,"position":1,"preview_image":{"aspect_ratio":1.066,"height":1407,"width":1500,"src":"\/\/www.actionmachineinc.com\/cdn\/shop\/products\/430-9A.UJoint.34.jpg?v=1562785608"},"aspect_ratio":1.066,"height":1407,"media_type":"image","src":"\/\/www.actionmachineinc.com\/cdn\/shop\/products\/430-9A.UJoint.34.jpg?v=1562785608","width":1500},{"alt":null,"id":3021941538951,"position":2,"preview_image":{"aspect_ratio":1.277,"height":1500,"width":1916,"src":"\/\/www.actionmachineinc.com\/cdn\/shop\/products\/430-9A.UJoint.jpg?v=1562785612"},"aspect_ratio":1.277,"height":1500,"media_type":"image","src":"\/\/www.actionmachineinc.com\/cdn\/shop\/products\/430-9A.UJoint.jpg?v=1562785612","width":1916},{"alt":null,"id":3021941571719,"position":3,"preview_image":{"aspect_ratio":1.261,"height":1190,"width":1500,"src":"\/\/www.actionmachineinc.com\/cdn\/shop\/products\/430-9A.Box.jpg?v=1562785619"},"aspect_ratio":1.261,"height":1190,"media_type":"image","src":"\/\/www.actionmachineinc.com\/cdn\/shop\/products\/430-9A.Box.jpg?v=1562785619","width":1500}],"requires_selling_plan":false,"selling_plan_groups":[],"content":"\u003ch2\u003eRockford Drive Shaft Universal Joint 430-9A\u003cbr\u003e- Speciality “STAKED-IN” Replacement U-Joint\u003c\/h2\u003e\n\u003cinput id=\"tab1\" type=\"radio\" name=\"tabs\" checked\u003e \u003clabel for=\"tab1\"\u003eNotes\u003c\/label\u003e \u003cinput id=\"tab2\" type=\"radio\" name=\"tabs\"\u003e \u003clabel for=\"tab2\"\u003eSpecs\u003c\/label\u003e \u003cinput id=\"tab3\" type=\"radio\" name=\"tabs\"\u003e \u003clabel for=\"tab3\"\u003eVehicle Fit\u003c\/label\u003e \u003cinput id=\"tab4\" type=\"radio\" name=\"tabs\"\u003e \u003clabel for=\"tab4\"\u003eInstall\u003c\/label\u003e\n\u003csection id=\"content1\"\u003e\n\u003cp\u003e\u003cspan\u003eThis u-joint replaces the OEM ‘staked in’ u-joint found on select vehicles. See vehicle fitment section for the list of applicable vehicles. The u-joint converts from the OEM staked u-joint to an inside C-clip u-joint using the flats on the inside of the yoke ears. The yoke ears must have milled flats for this u-joint to fit. \u003c\/span\u003e\u003cspan\u003eDouble check the application before you press or cut out your original equipment u-joints. \u003c\/span\u003e\u003c\/p\u003e\n\u003cp\u003e \u003c\/p\u003e\n\u003c\/section\u003e\n\u003csection id=\"content2\"\u003e\n\u003cp\u003e\u003cstrong\u003eSpecifications\u003c\/strong\u003e\u003c\/p\u003e\n\u003cmeta charset=\"utf-8\"\u003e\n\u003ctable class=\"table\" data-mce-fragment=\"1\"\u003e\n\u003ctbody data-mce-fragment=\"1\"\u003e\n\u003ctr data-ng-repeat=\"(key,val) in part.partData.attrs\" class=\"ng-scope\" data-mce-fragment=\"1\"\u003e\n\u003ctd class=\"ng-binding\" data-mce-fragment=\"1\"\u003e\u003cstrong\u003eOEM Series:\u003c\/strong\u003e\u003c\/td\u003e\n\u003ctd class=\"ng-binding\" data-mce-fragment=\"1\"\u003eStaked-In Replacement\u003c\/td\u003e\n\u003c\/tr\u003e\n\u003ctr data-ng-repeat=\"(key,val) in part.partData.attrs\" class=\"ng-scope\" data-mce-fragment=\"1\"\u003e\n\u003ctd class=\"ng-binding\" data-mce-fragment=\"1\"\u003e\u003cstrong\u003eManufacturer:\u003c\/strong\u003e\u003c\/td\u003e\n\u003ctd class=\"ng-binding\" data-mce-fragment=\"1\"\u003eRockford\u003c\/td\u003e\n\u003c\/tr\u003e\n\u003ctr data-ng-repeat=\"(key,val) in part.partData.attrs\" class=\"ng-scope\" data-mce-fragment=\"1\"\u003e\n\u003ctd class=\"ng-binding\" data-mce-fragment=\"1\"\u003e\u003cstrong\u003eGreasable:\u003c\/strong\u003e\u003c\/td\u003e\n\u003ctd class=\"ng-binding\" data-mce-fragment=\"1\"\u003eGreasable\u003c\/td\u003e\n\u003c\/tr\u003e\n\u003ctr data-ng-repeat=\"(key,val) in part.partData.attrs\" class=\"ng-scope\" data-mce-fragment=\"1\"\u003e\n\u003ctd class=\"ng-binding\" data-mce-fragment=\"1\"\u003e\u003cstrong\u003eSnap Ring Type:\u003c\/strong\u003e\u003c\/td\u003e\n\u003ctd class=\"ng-binding\" data-mce-fragment=\"1\"\u003eInside Snap Ring\u003c\/td\u003e\n\u003c\/tr\u003e\n\u003ctr data-ng-repeat=\"(key,val) in part.partData.attrs\" class=\"ng-scope\" data-mce-fragment=\"1\"\u003e\n\u003ctd class=\"ng-binding\" data-mce-fragment=\"1\"\u003e\u003cstrong\u003eManufacturer Part Number:\u003c\/strong\u003e\u003c\/td\u003e\n\u003ctd class=\"ng-binding\" data-mce-fragment=\"1\"\u003e430-9A\u003c\/td\u003e\n\u003c\/tr\u003e\n\u003ctr data-ng-repeat=\"(key,val) in part.partData.attrs\" class=\"ng-scope\" data-mce-fragment=\"1\"\u003e\n\u003ctd class=\"ng-binding\" data-mce-fragment=\"1\"\u003e\u003cstrong\u003eBearing Cap Diameter:\u003c\/strong\u003e\u003c\/td\u003e\n\u003ctd class=\"ng-binding\" data-mce-fragment=\"1\"\u003e0.791 Inch\u003c\/td\u003e\n\u003c\/tr\u003e\n\u003ctr data-ng-repeat=\"(key,val) in part.partData.attrs\" class=\"ng-scope\" data-mce-fragment=\"1\"\u003e\n\u003ctd class=\"ng-binding\" data-mce-fragment=\"1\"\u003e\u003cstrong\u003eLock Up:\u003c\/strong\u003e\u003c\/td\u003e\n\u003ctd class=\"ng-binding\" data-mce-fragment=\"1\"\u003e1.315 Inch\u003c\/td\u003e\n\u003c\/tr\u003e\n\u003c\/tbody\u003e\n\u003c\/table\u003e\n\u003cp\u003e\u003cem\u003eVMRS: 024002046\u003c\/em\u003e\u003c\/p\u003e\n\u003c\/section\u003e\n\u003csection id=\"content3\"\u003e\n\u003cp\u003e\u003cstrong\u003eVehicle Fitment\u003c\/strong\u003e\u003c\/p\u003e\n\u003ctable width=\"100%\"\u003e\n\u003ctbody\u003e\n\u003ctr\u003e\n\u003ctd style=\"width: 34.2612%;\"\u003e\u003cstrong\u003eMake \u0026amp; Model \u003c\/strong\u003e\u003c\/td\u003e\n\u003ctd style=\"width: 43.7388%;\"\u003e\u003cstrong\u003eYear\u003c\/strong\u003e\u003c\/td\u003e\n\u003c\/tr\u003e\n\u003ctr\u003e\n\u003ctd style=\"width: 34.2612%;\"\u003eHonda, \u003cem\u003eCRV\u003c\/em\u003e\n\u003c\/td\u003e\n\u003ctd style=\"width: 43.7388%;\"\u003e2002, 2003, 2004, 2005, 2006\u003c\/td\u003e\n\u003c\/tr\u003e\n\u003c\/tbody\u003e\n\u003c\/table\u003e\n\u003c\/section\u003e\n\u003csection id=\"content4\"\u003e\n\u003ch3\u003e\u003cstrong\u003eDisassembly of the “Non-Rebuildable” U-Joint\u003c\/strong\u003e\u003c\/h3\u003e\n\u003cp\u003e\u003cstrong\u003e\u003cimg src=\"\/\/cdn.shopify.com\/s\/files\/1\/2012\/8549\/files\/DISASSEMBLY_large.png?v=1562953594\" alt=\"Disassembly\"\u003e\u003c\/strong\u003e\u003c\/p\u003e\n\u003cp\u003e\u003cstrong\u003e1.\u003c\/strong\u003e Use a press or a hammer to force the bearing cap out of the staked ear hole.* \u003cem\u003eNOTE: CONSIDERABLE FORCE MAY BE REQUIRED.\u003c\/em\u003e\u003cbr\u003e\u003cstrong\u003e2.\u003c\/strong\u003e Use a vise or pliers to remove the bearing cap which is exposed on the opposing side, a twisting motion may help unseat the cap.\u003cbr\u003e\u003cstrong\u003e3.\u003c\/strong\u003e A small grinding wheel or cartridge roll \u0026amp; arbor may then be used to smooth the staked earhole on the driven side “A” in order to make the removal of the opposite bearing cap easier.\u003cbr\u003e\u003cstrong\u003e4.\u003c\/strong\u003e Use the same method as above to remove the remaining bearing caps.\u003cbr\u003e\u003cstrong\u003e5.\u003c\/strong\u003e Once the bearing caps are removed discard the used joint and inspect the yoke and flange for damage and clean out the remaining staked tabs\u003c\/p\u003e\n\u003ch3\u003eReassembly of the “Non-Rebuildable” U-Joint\u003c\/h3\u003e\n\u003cp\u003e\u003cimg src=\"\/\/cdn.shopify.com\/s\/files\/1\/2012\/8549\/files\/reassembly_large.png?v=1562954694\" alt=\"Reassembly\"\u003e\u003c\/p\u003e\n\u003cp\u003e\u003cstrong\u003e1.\u003c\/strong\u003e Press the new U-joint and bearing caps into position and insert clip (Fig. 4). \u003cbr\u003e\u003cstrong\u003e2.\u003c\/strong\u003e Use a press or hammer to expose the opposite slot then insert the second clip (Fig. 5). \u003cbr\u003e\u003cstrong\u003e3.\u003c\/strong\u003e Use the same method to insert the remaining clips.\u003cbr\u003e\u003cstrong\u003e4.\u003c\/strong\u003e Make certain that the clips are completely seated into the groove of the new bearing caps. \u003c\/p\u003e\n\u003cp\u003e\u003cstrong\u003eInstallation tips\u003c\/strong\u003e\u003c\/p\u003e\n\u003cp\u003e- When the snap rings are installed they may leave a large gap at the top of the yoke.\u003cbr\u003e-To assure a good contact fit you need to roll the snap ring around in the groove of the cup to get the most possible surface of the snap ring against the inside of the yoke ears\u003c\/p\u003e\n\u003cp\u003e\u003cimg src=\"\/\/cdn.shopify.com\/s\/files\/1\/2012\/8549\/files\/Snap_Ring_large.png?v=1562955278\" alt=\"Snap Ring Install\"\u003e\u003c\/p\u003e\n\u003cp\u003e1. Install Snap Ring into Bearing Cup Groove\u003cbr\u003e2. Rotate Snap Ring 180 degrees\u003cbr\u003e3. Placement required to get most contact with yoke\u003c\/p\u003e\n\u003c\/section\u003e\n\u003cstyle\u003e\u003c!--\np:not(:last-child) {\n margin: 0 0 20px;\n}\n\n\nsection {\n display: none;\n padding: 50px 0 0;\n border-top: 1px solid #DE330E;\n}\n\n#tab1 {\n display: none;\n}\n#tab2 {\n display: none;\n}\n#tab3 {\n display: none;\n}\n#tab4 {\n display: none;\n}\n\nlabel {\n display: inline-block;\n margin: 0 0 -1px;\n padding: 15px 25px;\n font-weight: 600;\n text-align: center;\n color: #abc;\n border: 1px solid transparent;\n}\n\nlabel:before {\n \n font-weight: normal;\n margin-right: 10px;\n}\n\nlabel[for*='1']:before { content: '\\f1cb'; }\nlabel[for*='2']:before { content: '\\f17d'; }\nlabel[for*='3']:before { content: '\\f16c'; }\nlabel[for*='4']:before { content: '\\f171'; }\n\nlabel:hover {\n color: #789;\n cursor: pointer;\n}\n\ninput:checked + label {\n color: #DE330E;\n border: 1px solid #abc;\n border-top: 2px solid #DE330E;\n border-bottom: 1px solid #fff;\n}\n\n#tab1:checked ~ #content1,\n#tab2:checked ~ #content2,\n#tab3:checked ~ #content3,\n#tab4:checked ~ #content4 {\n display: block;\n}\n--\u003e\u003c\/style\u003e"}
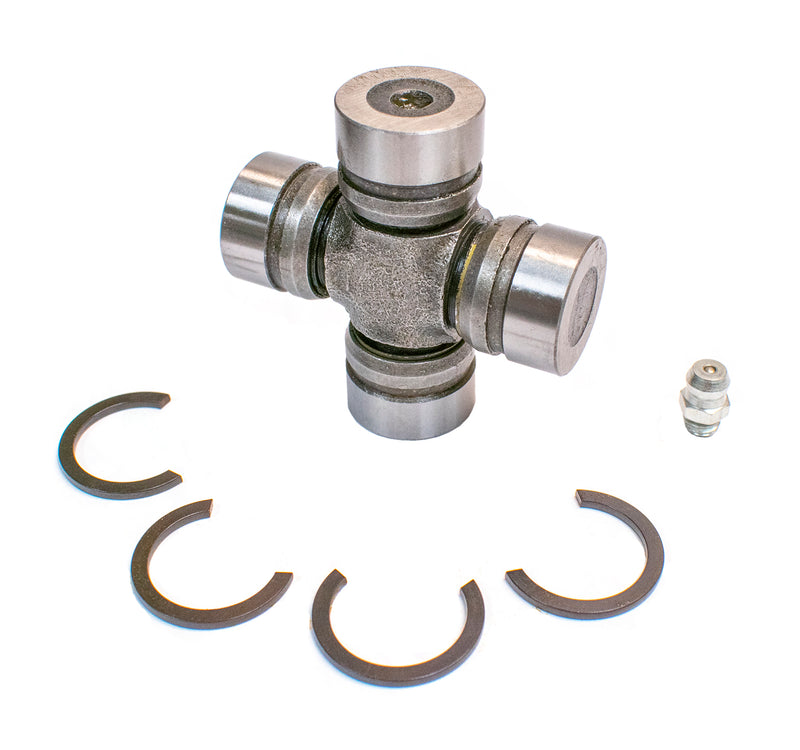
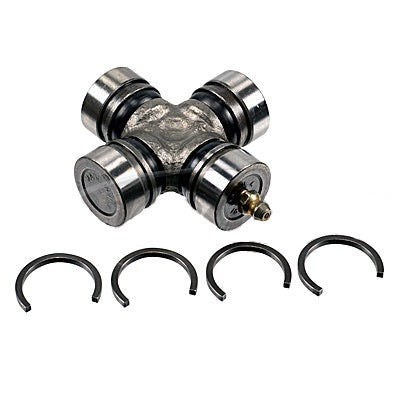
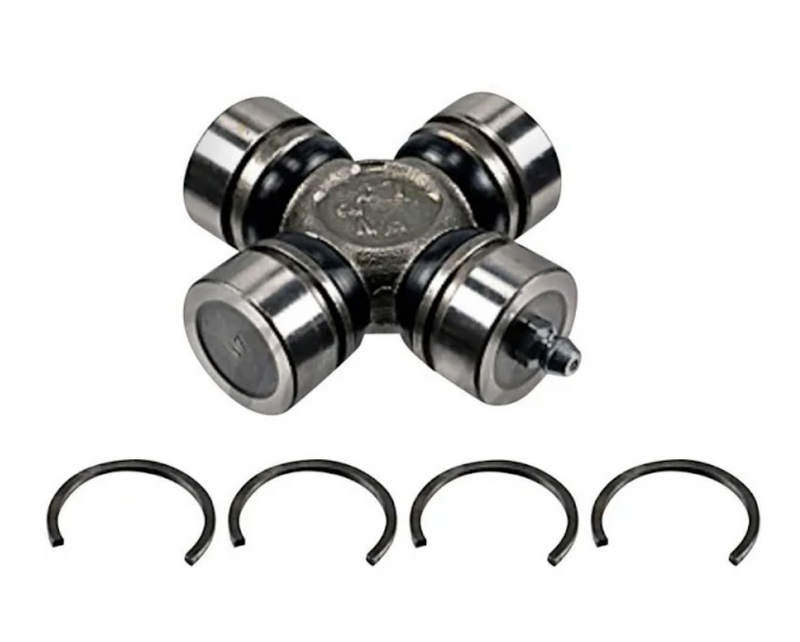
Rockford 430-9A U-Joint "Staked In"
Vendor: Rockford, Sku: 430-9A
DETAILS
| OEM Series: | Staked-In Replacement |
| Manufacturer: | Rockford |
| Greasable: | Greasable |
| Snap Ring Type: | Inside Snap Ring |
| Manufacturer Part Number: | 430-9A |
| Bearing Cap Diameter: | 0.791" |
| Lock Up: | 1.315" |
| OEM/Alternate Part Number: |
Customer Reviews
Based on 2 reviews
Write a review
